
Believe it or not, the answer to this very frequent question is inside the WooCommerce settings… so don’t worry too much about coding if you’re not a developer!
From the WooCommerce shipping rates, you can select “Free Shipping” as a method but that would apply to ALL products – so how do you override the shipping settings and allow a single product to have free shipping?
1. Create a Shipping Class
From the WordPress dashboard, go to WooCommerce > Settings > Shipping > Shipping Classes > Add Shipping Class. Call it “Free Shipping” or whatever you like.

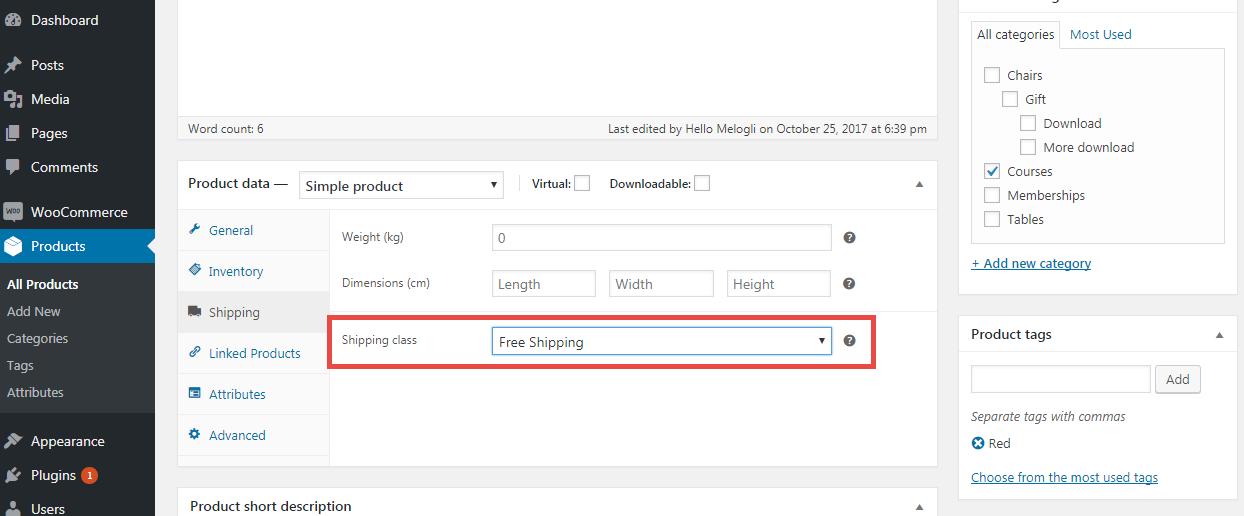
2. Assign the new Shipping Class to your Product
Edit the product that requires free shipping by going to Product Data > Shipping > Shipping Class and assigning the “Free Shipping” shipping class to it. Update the product (if you go back to the admin page WooCommerce > Settings > Shipping > Shipping Classes, you should now see a “1” under “Product Count”).
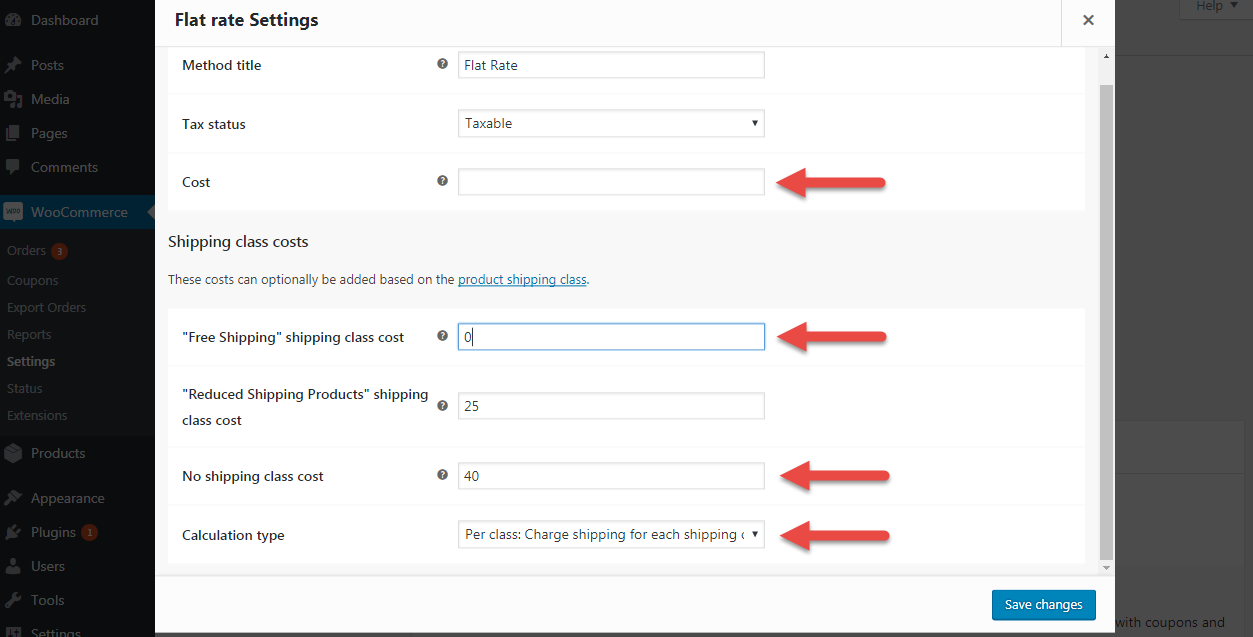
3. Set up a Flat Rate based on Shipping Class
Go to WooCommerce > Settings > Shipping > Shipping Zones. In each zone you should have at least 1 Flat Rate. Edit each Flat Rate, and make sure:
- Cost is $0
- “Free Shipping” class cost is $0
- “No shipping class” cost is whatever it would be for other products
- “Charge per class” is enabled
That’s it.
Now if the product is in the cart and you’ve set up things properly, shipping will be free for it alone 🙂