Home » WooCommerce: How to Clone/Migrate (Step by Step)?

WooCommerce: How to Clone/Migrate (Step by Step)?

by Tutor Aspire

Maybe you don’t have staging, and you need to clone your WooCommerce website elsewhere to test updates or new functionality (because you’re not doing that on a live website, right?). Maybe you need to migrate an existing WooCommerce website to another server. Or, like me, maybe you need to copy an entire WooCommerce website on a fresh subdomain in order to write this step-by-step tutorial!

Either way, the free Duplicator plugin, available on the official WordPress.org repository, is your best friend. Whether you need to duplicate, clone, migrate, copy or even backup your WooCommerce website, Duplicator is the most straight forward system to achieve that.

Of course, is not super simple and this is why you’re reading this step-by-step tutorial about duplicating WooCommerce websites (including helpful screenshots). Hope this is helpful to those of you who need to achieve a complex and delicate operation (cloning/migrating is ALWAYS a delicate thing) within few steps.

All you need is an existing WooCommerce website, the Duplicator plugin, an FTP client (or File Manager) and access to the server where you will create the new subdomain and blank database. All the rest is handled by the plugin, so here’s the tutorial you were waiting for.

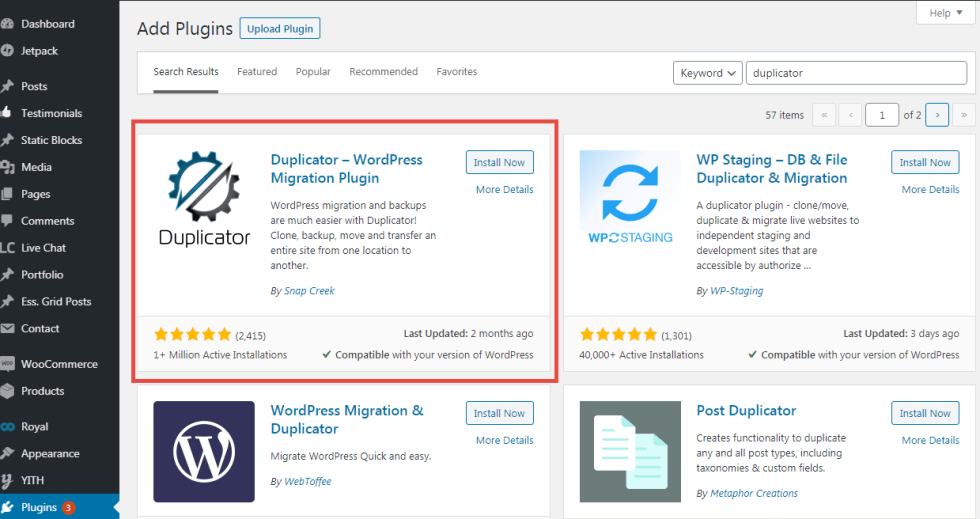
1. Existing WooCommerce Website: Install Duplicator

Select your existing WooCommerce install you want to clone, and add and activate the Duplicator plugin.

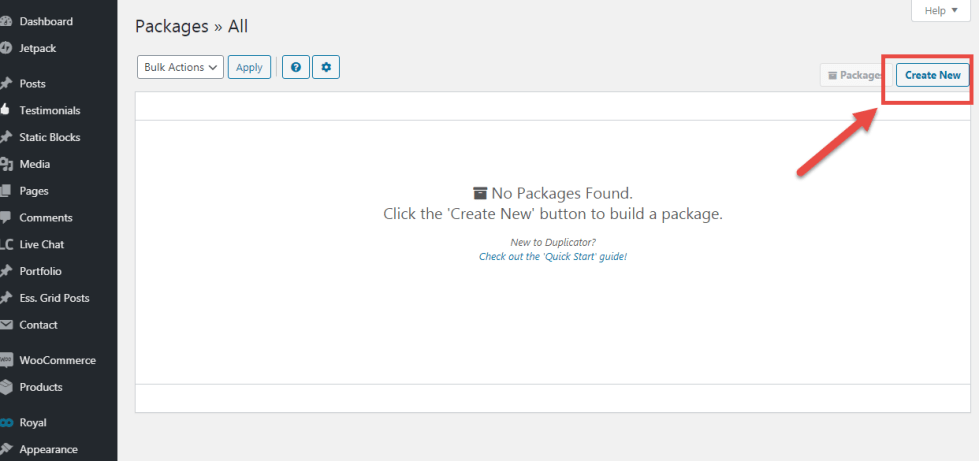
2. Existing WooCommerce Website: Create a new package

Go to Duplicator and click on “Create New” package.

3. Existing WooCommerce Website: Set up the new package

Set the package name if you want, then decide if you want to exclude certain files from the clone. For example, ZIP files. Or PDF files. Or even all your images, so the process will be much faster.

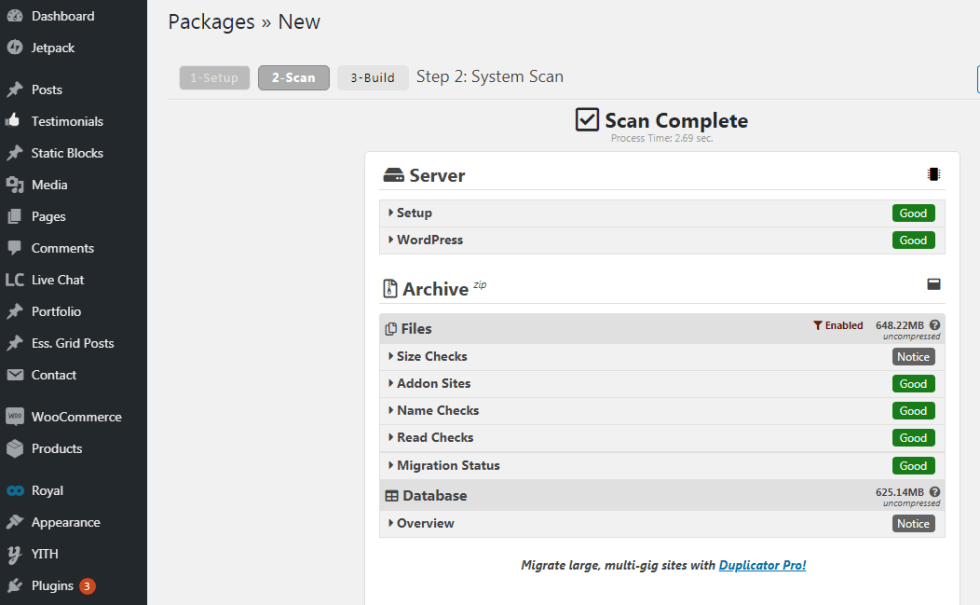
4. Existing WooCommerce Website: Scan the new package

When you move to the Scan step, the system will give you warnings if the package is too big in size or if there are other errors. In case you can go back to the Setup step and add more file exclusions.

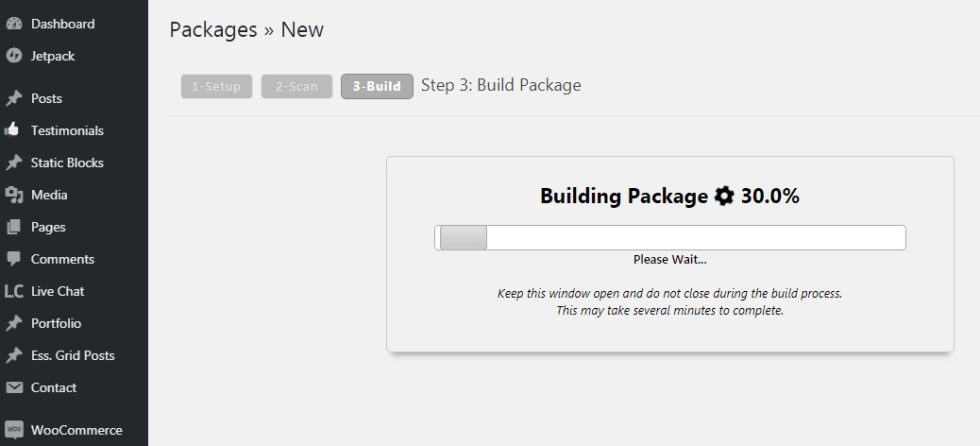
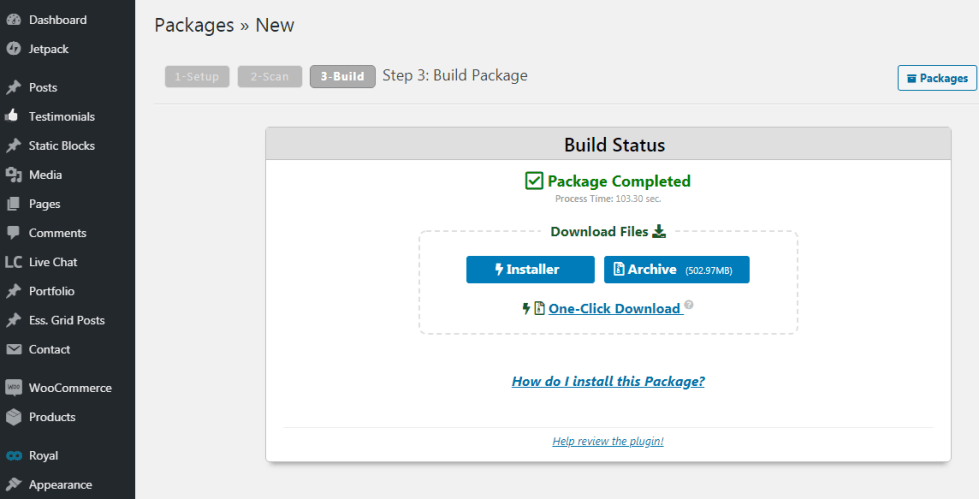
5. Existing WooCommerce Website: Build the new package

When you proceed to the “Build” step, Duplicator will slowly backup your existing WooCommerce website and will generate two files: an ARCHIVE file containing website files and database, and an INSTALLER file necessary to clone the website elsewhere.

6. Download the package

Now go ahead and download the INSTALLER and ARCHIVE files on your computer. We’ll need them later to create the website clone.

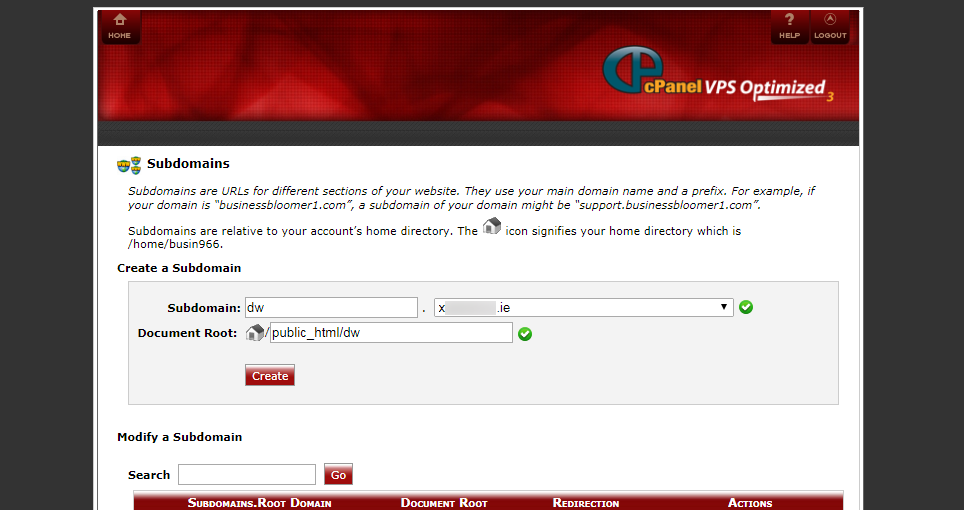
7. Hosting: Create a new subdomain

From your hosting control panel, create a new subdomain where you wish to place your WooCommerce clone. You’ll need FTP access to this folder later.

8. Hosting: Create a new database

From your hosting control panel, create a new MySQL database through the wizard. You will need to set a database name, a database user and a database password. You’ll need these at step 11.

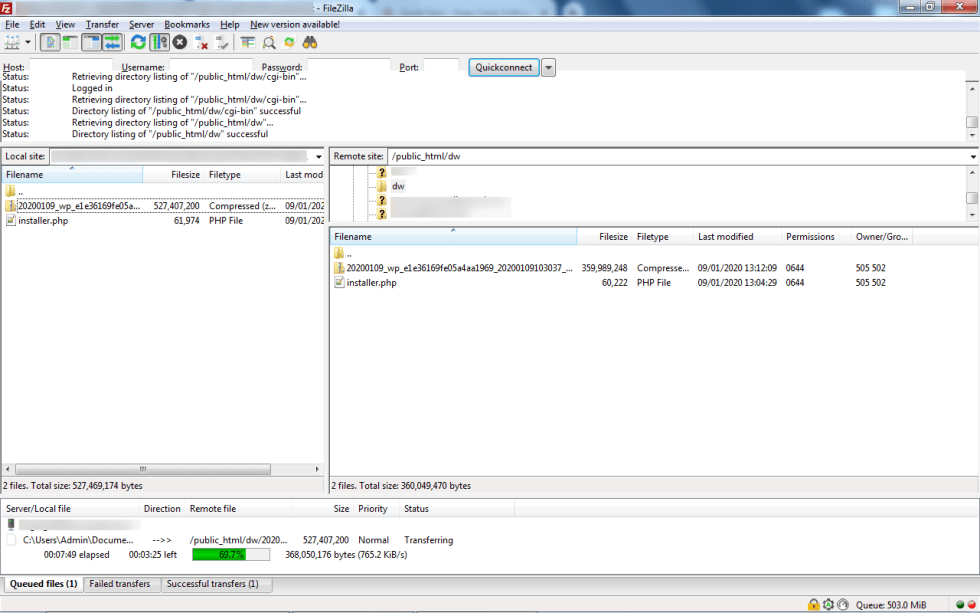
9. FTP: Place package in the subdomain folder

With an FTP software, place the INSTALLER and ARCHIVE files inside your subdomain folder. It should be empty i.e. there should not be another WordPress install or such.

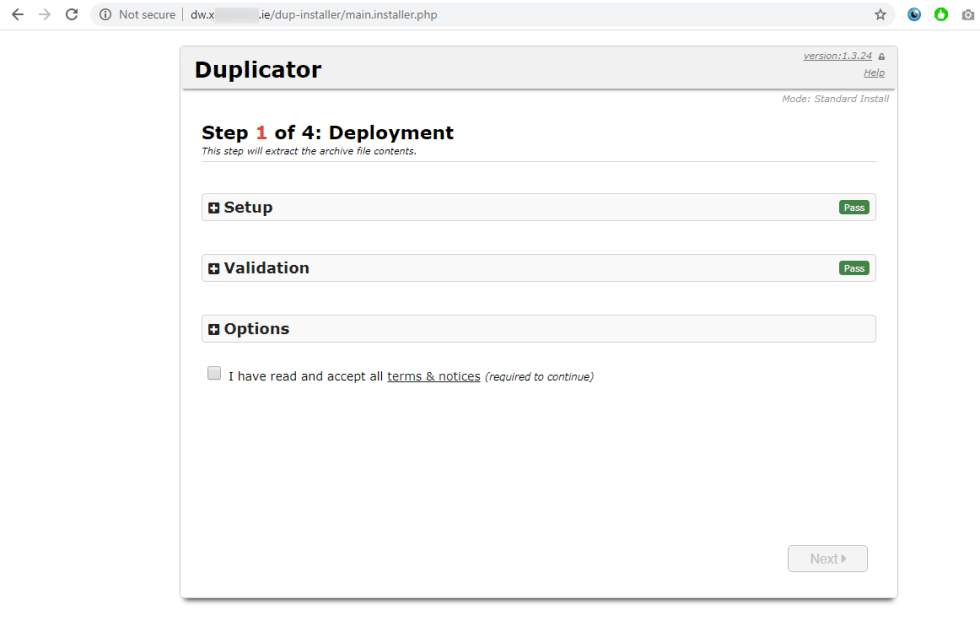
10. Run the installer

Now open your browser and go to https://SUBDOMAIN_URL/installer.php. If you’ve placed the installer in the correct folder, Duplicator will display Step 1 and “Setup” and “Validation” will show a “Pass” badge.

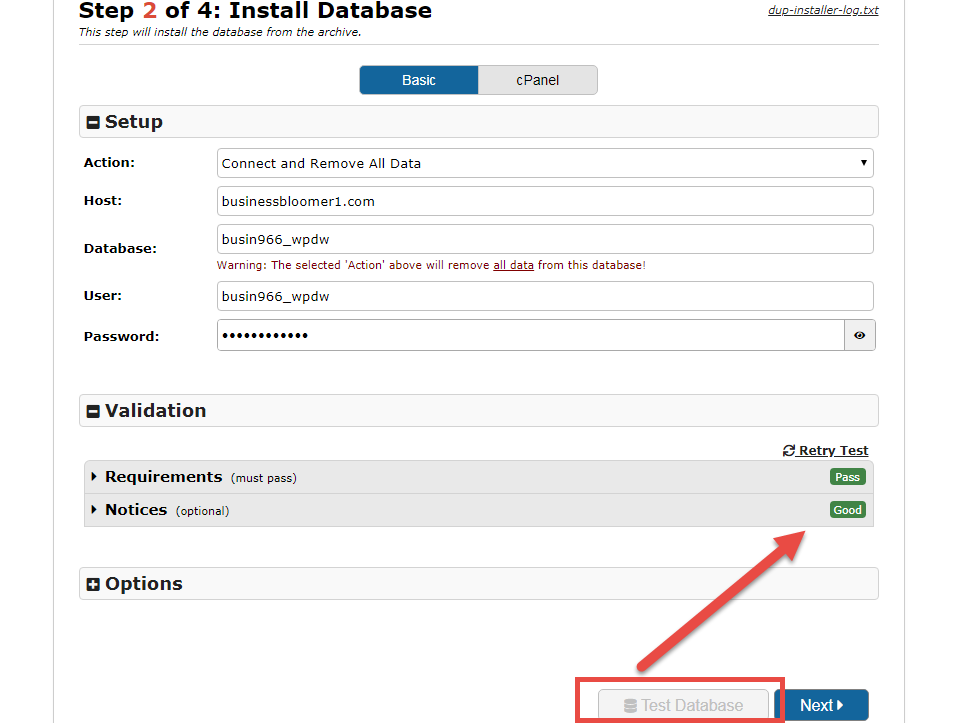
11. Set up the installer

This is the most difficult and more “technical” step of the cloning process. Earlier, we created a database so you should have the database name, user and password available already and you can enter them in the relative input fields. The most complex input field is the “Host” one, but not that much really. It’s basically your hosting control panel “Main Domain”. If not sure, ask your host.

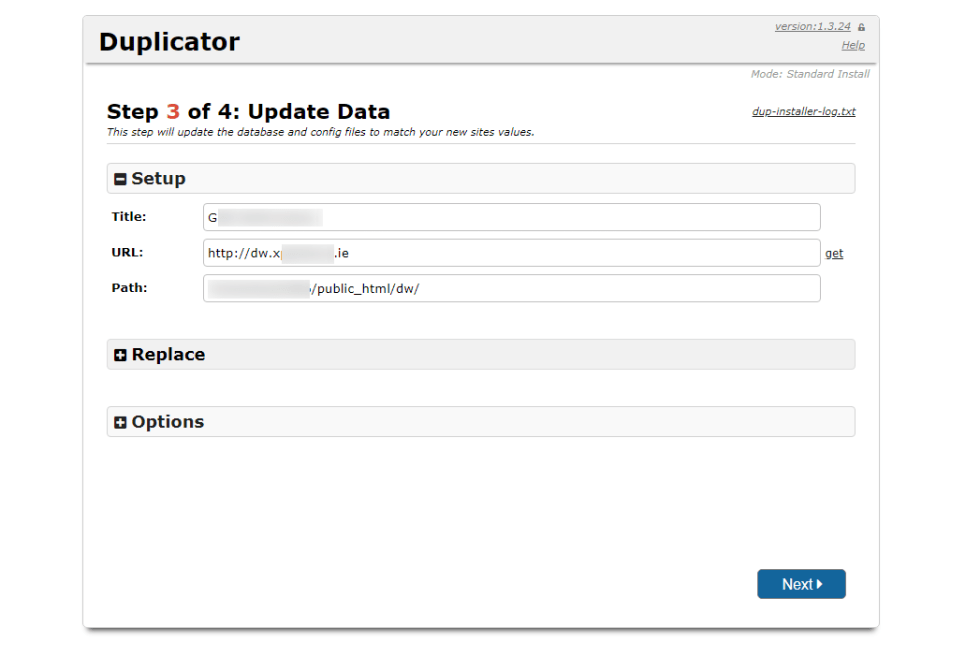
12. Review the installer setup

On step 3, simply review the “Setup” window, and make sure title, URL and path are correct. Title will be taken from the original website, URL should be the URL of your NEW WooCommerce clone. Then click on Next.

13. New WooCommerce Website: login

That’s it – easy peasy! You can now login to the cloned site and verify everything is working properly. Of course, you can login with the same credentials you use for the existing WooCommerce website.

You may also like